Securely Manage Remote PostgreSQL Servers with pgAdmin on Mac OS X
Traducciones al EspañolEstamos traduciendo nuestros guías y tutoriales al Español. Es posible que usted esté viendo una traducción generada automáticamente. Estamos trabajando con traductores profesionales para verificar las traducciones de nuestro sitio web. Este proyecto es un trabajo en curso.


pgAdmin is a free, open-source PostgreSQL database administration GUI for Microsoft Windows, Apple Mac OS X and Linux systems. It offers excellent capabilities with regard to database server information retrieval, development, testing, and ongoing maintenance. This guide will help you get up and running with pgAdmin on Mac OS X, providing secure access to remote PostgreSQL databases. It is assumed that you have already installed PostgreSQL on your Linode in accordance with our PostgreSQL installation guides.
Install pgAdmin
Visit the pgAdmin download page to obtain the most recent version of the program. Save the installer to your desktop and launch it. Read the license agreement and click the “Agree” button to continue.

After the program has uncompressed itself, you’ll see a pgAdmin icon in a Finder window. You may drag this to your Applications folder or your dock.
After starting pgAdmin, open a new pgAdmin window by selecting the pgAdmin logo in the menu bar and selecting “New pgAdmin 4 window…”
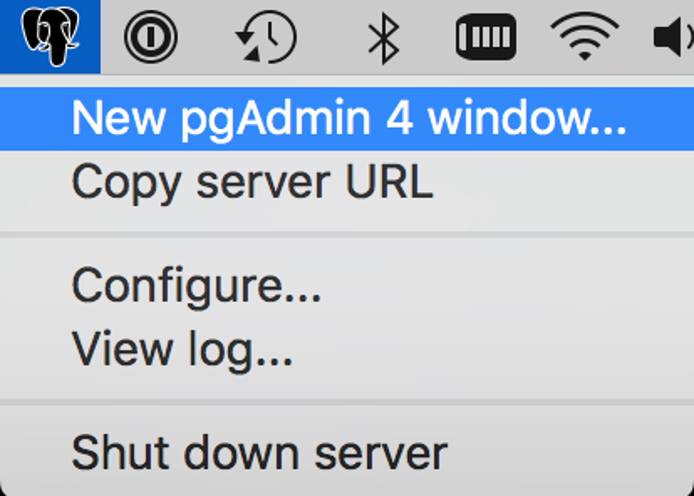
A new window will be displayed in your web browser with the pgAdmin interface.
Configure SSH Tunnel
While PostgreSQL supports SSL connections, it is not advisable to instruct it to listen on public IP addresses unless absolutely necessary. For this reason, you’ll be using the following command to create an SSH tunnel to your database server, replacing username with your Linux username and remote-host with your Linode’s hostname or IP address:
ssh -f -L 5433:127.0.0.1:5432 username@remote-host -N
Although PostgreSQL uses port 5432 for TCP connections, we’re using the local port 5433 in case you decide to install PostgreSQL locally later on.
Use pgAdmin
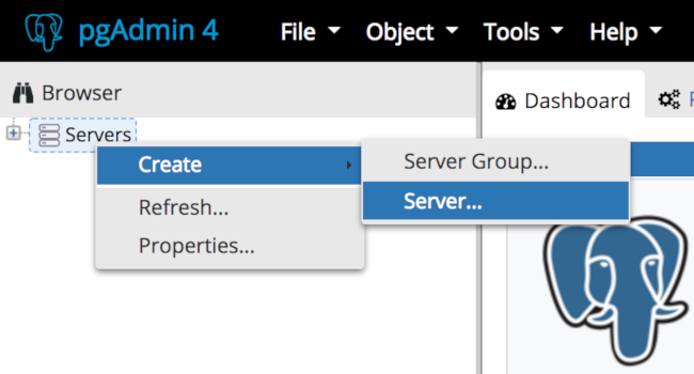
Launch pgAdmin and you’ll be presented with a default view containing no servers. Right click “Servers” and then navigate to “Create > Server”.
If you’re having problems connecting, you may need to check PostgreSQL’s configuration to ensure it accepts connections. Modify the following lines in
/etc/postgresql/9.5/main/postgresql.confif necessary:- File: /etc/postgresql/9.5/main/postgresql.conf
1 2 3listen_addresses = 'localhost' port = 5432
Restart PostgreSQL to activate these changes. This command may vary among different distributions:
sudo systemctl restart postgresqlIn the “Create-Server” dialog that appears, enter a name for your server.
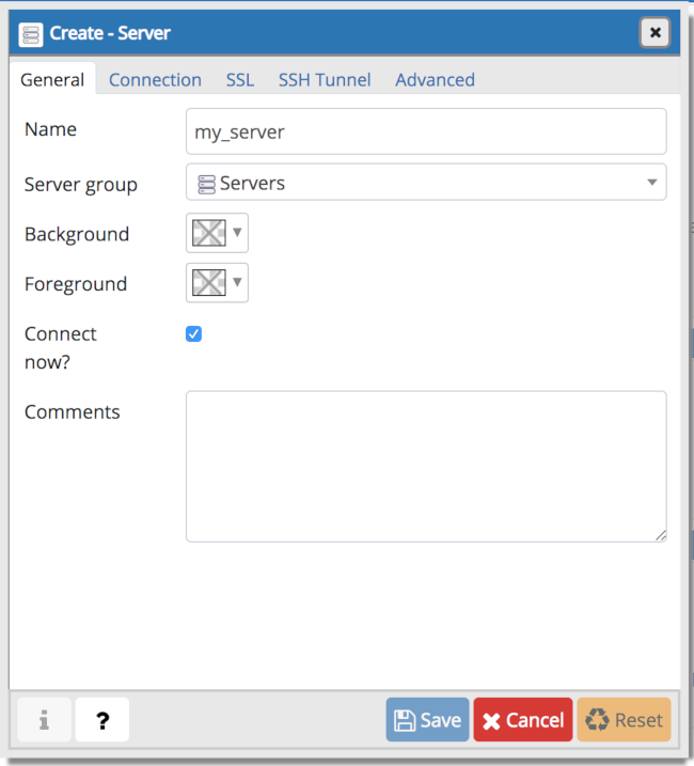
In the “Connections” tab enter “localhost” for the “Host name/address” field, as you’ll be connecting via your SSH tunnel, and set the port to 5433. In the username and password fields, enter the credentials you specified when setting up PostgreSQL.
For greater security, uncheck the "Save password" box. Click "Save" to connect to your server.

You will be presented with a full view of the databases that your user account has access to:
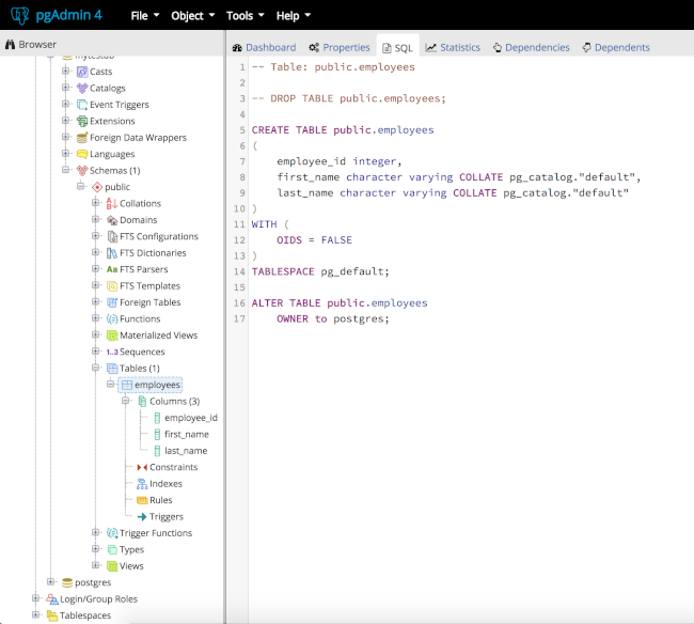
Congratulations! You’ve securely connected to your remote PostgreSQL server with pgAdmin 4.
More Information
You may wish to consult the following resources for additional information on this topic. While these are provided in the hope that they will be useful, please note that we cannot vouch for the accuracy or timeliness of externally hosted materials.
This page was originally published on


