Install Plex Media Server on Ubuntu 18.04
Traducciones al EspañolEstamos traduciendo nuestros guías y tutoriales al Español. Es posible que usted esté viendo una traducción generada automáticamente. Estamos trabajando con traductores profesionales para verificar las traducciones de nuestro sitio web. Este proyecto es un trabajo en curso.
Plex is a feature-rich media library platform that allows you to organize and stream your digital video and audio from anywhere. This guide shows you how to set up the Plex Media Server on your Linode running Ubuntu 18.04 LTS, as well as how to connect to your media server from a [Plex client application](https://www.plex.tv/apps-devices/. A Plex media server could benefit from large amounts of disk space, so consider using our Block Storage service with this setup.


NoteThis guide is written for a non-root user. Commands that require elevated privileges are prefixed withsudo. If you’re not familiar with thesudocommand, see the Users and Groups guide.
Prerequisites to Install Plex Media Server on Ubuntu 18.04
If you have not already done so, create a Linode account and Compute Instance. See our Getting Started with Linode and Creating a Compute Instance guides.
Follow our Setting Up and Securing a Compute Instance guide to update your system. You may also wish to set the timezone, configure your hostname, create a limited user account, and harden SSH access.
Create a Plex account. This is required to make use of the service, and provides additional features such as DVR capability and offline viewing if you pay for their premium Plex Pass. Purchasing a premium Plex Pass is optional.
Installing Plex Media Server on Ubuntu 18.04
This section shows you how to install the Plex Media Server on your Ubuntu 18.04 Linode.
Go to the Plex Server Downloads page and select Linux from the Plex Media Server dropdown menu.
Click on the Choose Distribution button and copy the installation link for Ubuntu. For example, the Ubuntu (16.04+) / Debian (8+) - Intel/AMD 64-bit link is compatible with a Linode running Ubuntu 18.04.
Connect to your Ubuntu 18.04 Linode via SSH and use
wgetto download the installer via the copied link. Replace the link with your selected distribution as shown in the example below:wget https://downloads.plex.tv/plex-media-server/1.14.1.5488-cc260c476/plexmediaserver_1.14.1.5488-cc260c476_amd64.debThis example uses the current link for Ubuntu, at the time of writing. Be sure to use the up-to-date version supplied on the Plex website.
Use
dpkgto install the Plex.debfiles (Plex distribution) you downloaded usingwgetwith the following command:sudo dpkg -i plexmediaserver*.debTo start the Plex Media Server automatically when booting your Ubuntu, run the following commands:
sudo systemctl enable plexmediaserver.service
sudo systemctl start plexmediaserver.service
Configuring Plex Media Server on Ubuntu 18.04
In this section, you complete your server setup and start adding media libraries. Run the commands from this section on your local computer unless otherwise stated.
Setup an SSH tunnel to your Linode. Run the following command by replacing the username with your Linode system’s username and
192.0.2.1with your Linode’s IP address:ssh user@192.0.2.1 -L 8888:localhost:32400Open a browser and navigate to
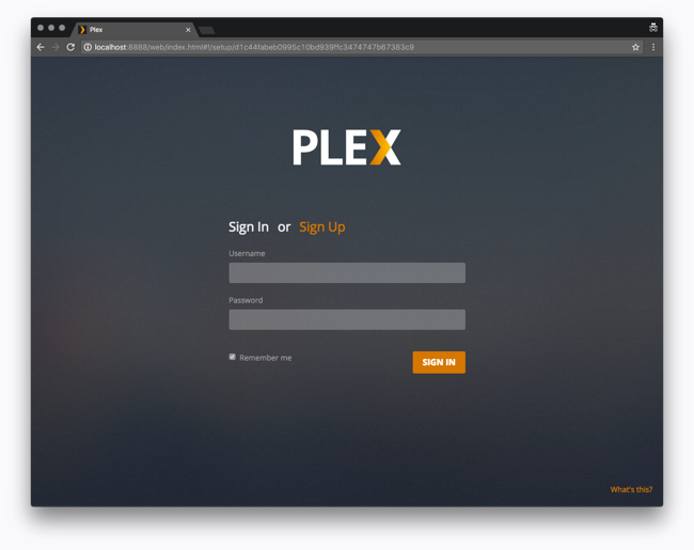
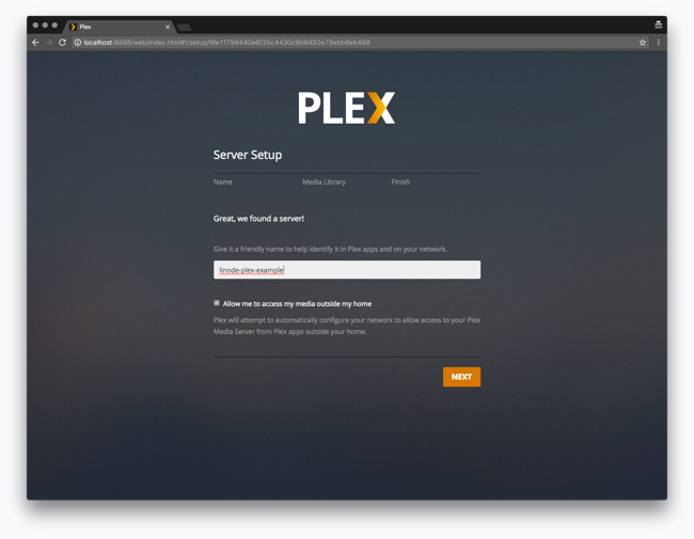
http://localhost:8888/webto view the Plex web interface. Input your Plex account username and password to proceed with the setup process:Give your Plex server a name. Be sure to leave the Allow me to access my media outside my home box checked, and click Next:
Finally, connect to your Linode via SSH to create the directories that store your Plex media. In the example, you create library directories for
moviesandtelevisionwithin aplex-mediadirectory. These are located within your user’s home directory (/home/username/):cd ~/ mkdir -p plex-media/movies && mkdir plex-media/television
Organizing Plex Media Server on Ubuntu 18.04
The steps in this section are performed using your Plex Media Server’s web interface.
Sign into your Plex Media Server’s account using the same credentials you used in the Configuring Plex Media Server on Ubuntu 18.04 section.
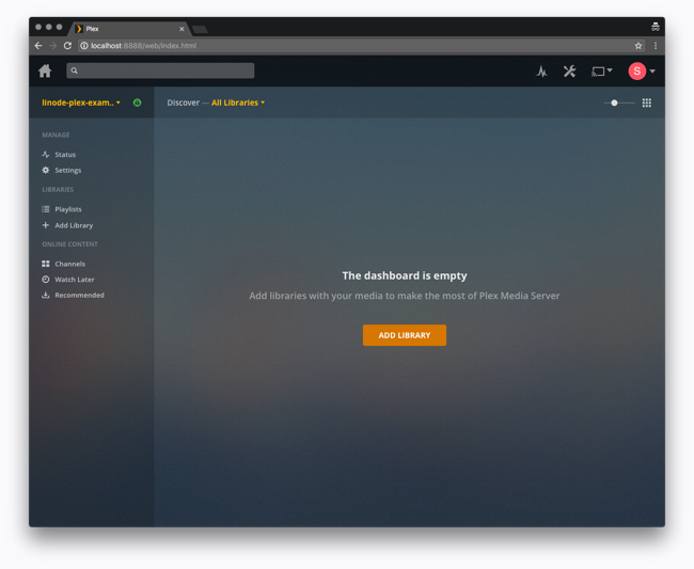
Once logged in, you should see the example page. Click the Add Library button to start setting up your media libraries:
Select your library type, and click Next:
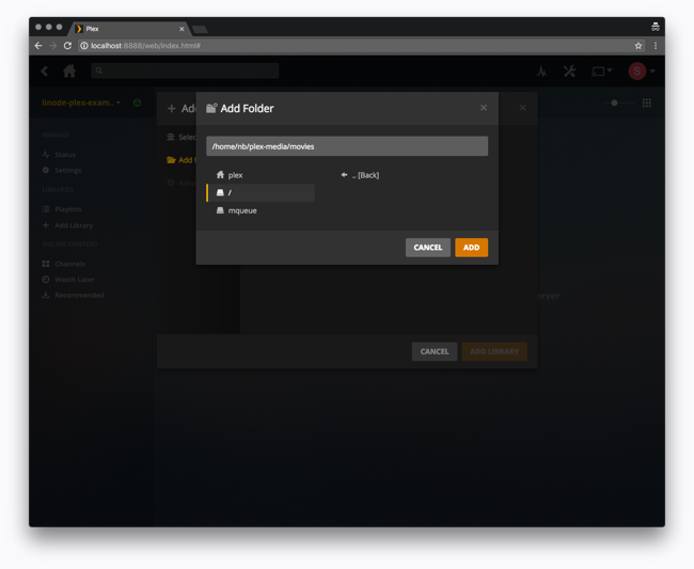
Navigate to the media directory that you created previously (
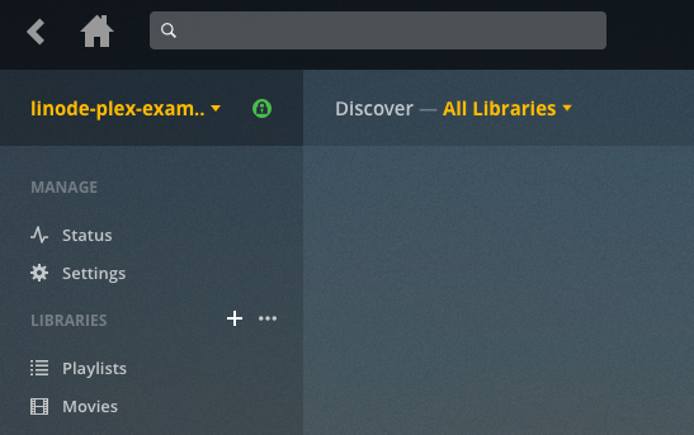
/home/username/plex-media/movies), then click Add:You can add additional libraries by clicking the + symbol next to the Libraries list on the Plex side bar:
Add your media to the appropriate directories. Be sure to review Plex’s naming conventions for media files to ensure that your files are identified correctly.
Disabling DLNA (Recommended)
In more recent versions of Plex Media Server, DLNA is usually disabled. However, with certain older distributions, you have to disable it manually. DLNA server uses Universal Plug and Play Protocol (UPnP) and is not specific to a user account. This means any app or device in a network can access files without restriction if DLNA is enabled. This section shows you how to disable DLNA.
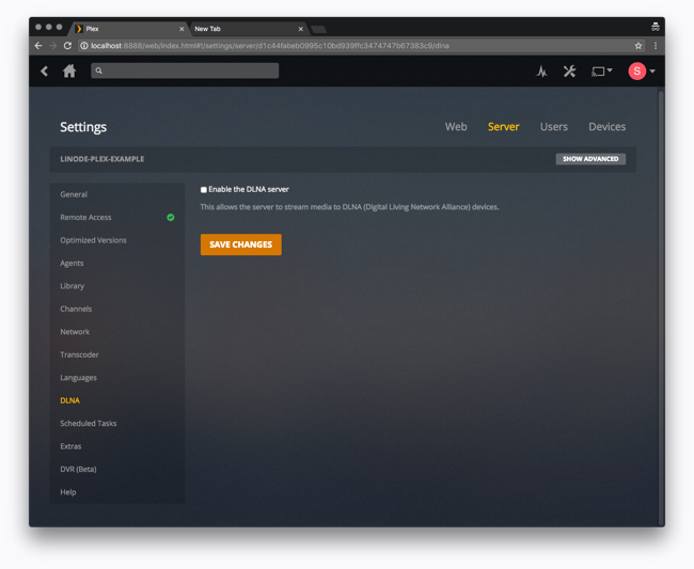
While logged into your Plex Media Server account, click on the wrench icon at the top and select Server.
Navigate to the DLNA section, uncheck Enable the DLNA server, and click Save Changes:
Connecting to Your Plex Server
Now that your server is set up, you’re ready to connect to it from a Plex client application. You can connect to your Plex Server from a device, like an Apple device.
Navigate to Plex’s list of streaming devices.
Select the right client for your device and download it.
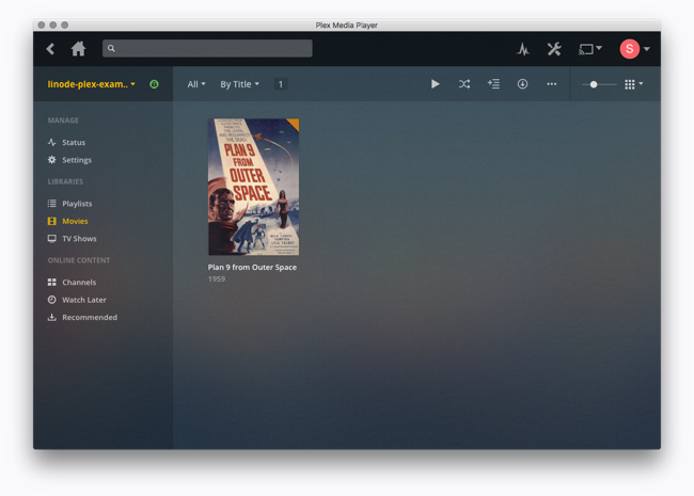
Next, sign-in to your Plex client application and select your server from the dropdown menu. Now, you can browse media files available on your Plex server.
Configuring Plex Media Server Firewall on Ubuntu 18.04
In this section you set up a firewall on your Plex Media Server using the Uncomplicated Firewall (UFW).
UFW is usually pre-installed on Ubuntu. If UFW isn’t installed, run the following command to install it on your Ubuntu system:
sudo apt-install ufwTo confirm that UFW is installed, view its status by running the example command. If the output returns a
Status: activeconfirmation, UFW is installed.sudo ufw status verboseUsing a text editor of your choice, create a new UFW application profile file in the following location
/etc/ufw/applications.d/plexmediaserver. Copy and past the contents of the example file to your ownplexmediaserverfile:- File: /etc/ufw/applications.d/plexmediaserver
1 2 3 4 5 6 7 8 9 10 11 12 13 14[plexmediaserver] title=Plex Media Server (Standard) description=The Plex Media Server ports=32400/tcp|3005/tcp|5353/udp|8324/tcp|32410:32414/udp [plexmediaserver-dlna] title=Plex Media Server (DLNA) description=The Plex Media Server (additional DLNA capability only) ports=1900/udp|32469/tcp [plexmediaserver-all] title=Plex Media Server (Standard + DLNA) description=The Plex Media Server (with additional DLNA capability) ports=32400/tcp|3005/tcp|5353/udp|8324/tcp|32410:32414/udp|1900/udp|32469/tcp
Save and update your UFW application profile:
sudo ufw app update plexmediaserverApply these UFW rules by running:
sudo ufw allow plexmediaserver-allYou should see a similar output, which confirms that your new firewall rules are in place.
To                                    Action      From
--                                    ------      ----
22/tcp                                ALLOW IN    Anywhere
32400/tcp (plexmediaserver-all)       ALLOW IN    Anywhere
3005/tcp (plexmediaserver-all)        ALLOW IN    Anywhere
5353/udp (plexmediaserver-all)        ALLOW IN    Anywhere
8324/tcp (plexmediaserver-all)        ALLOW IN    Anywhere
32410:32414/udp (plexmediaserver-all) ALLOW IN    Anywhere
1900/udp (plexmediaserver-all)        ALLOW IN    Anywhere
32469/tcp (plexmediaserver-all)       ALLOW IN    Anywhere
More Information
You may wish to consult the following resources for additional information on this topic. While these are provided in the hope that they will be useful, please note that we cannot vouch for the accuracy or timeliness of externally hosted materials.
This page was originally published on


