Getting Started with Pulumi
Traducciones al EspañolEstamos traduciendo nuestros guías y tutoriales al Español. Es posible que usted esté viendo una traducción generada automáticamente. Estamos trabajando con traductores profesionales para verificar las traducciones de nuestro sitio web. Este proyecto es un trabajo en curso.
What is Pulumi?
Pulumi is a development tool that allows you to write computer programs which deploy cloud resources–a practice referred to as infrastructure as code (IaC). Pulumi integrates with multiple cloud platforms, and Pulumi programs can be authored in a number of common programming languages.
With Pulumi’s Linode integration, you can manage your Linode resources as you would with our API or CLI, but in a language you may already be familiar with. This guide will present examples written in JavaScript, but Pulumi is also compatible with Go, Python, and TypeScript.
Pulumi also comes with a CLI interface for running the cloud infrastructure programs that you write. Once you’ve written a program, you can create your cloud resources with a single command:
pulumi up
In this guide you will learn how to:
- Install and set up Pulumi on Debian 9
- Create a single Linode instance using Pulumi and JavaScript
- Create a NodeBalancer with two NGINX webserver backends using Pulumi and JavaScript
Before You Begin
If you haven’t yet, create a Linode API token.
Create a new Debian 9 Linode. Follow our Creating a Compute Instance guide to deploy the Linode, and then follow the Setting Up and Securing a Compute Instance guide. Be sure to create a limited Linux user with sudo privileges on your server. All commands in this guide are to be run from a sudo user.
Install Pulumi on your Linode using their installation script:
curl -fsSL https://get.pulumi.com | shTo start using the Pulumi CLI:
Restart your shell session, or
Add
/home/username/.pulumi/binto your$PATHvariable in your current session. Replaceusernamewith the name of your limited Linux user:PATH=$PATH:/home/username/.pulumi/bin
 sudo apt-get install curl software-properties-common
 curl -sL https://deb.nodesource.com/setup_12.x | sudo bash -
 sudo apt-get install -y nodejs
Generate a Pulumi Access Token
Once you have a Pulumi account, you will need to create an access token to use later.
When Pulumi interprets the infrastructure programs that you write, it determines what cloud resources it needs to create in order to satisfy your program. Every time you run your program, Pulumi stores the state of these resources in a persistent backend. In subsequent updates to your infrastructure, Pulumi will compare your program with the recorded state so that it can determine which changes need to be made.
By default, Pulumi securely stores this state information on a web backend hosted at https://app.pulumi.com. This service is free to start and offers paid tiers for teams and enterprises.
It is possible to opt-out of using the default web backend and use a filesystem-based backend instead. Review Pulumi’s documentation for instructions.
When Pulumi interprets the infrastructure programs that you write, it determines what cloud …
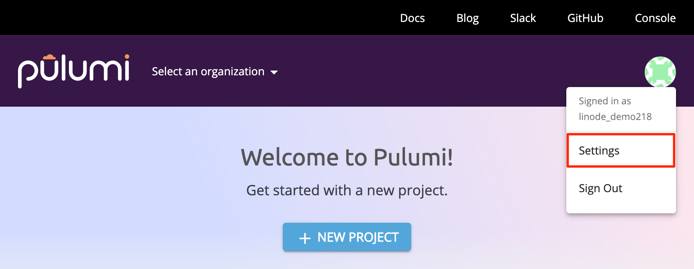
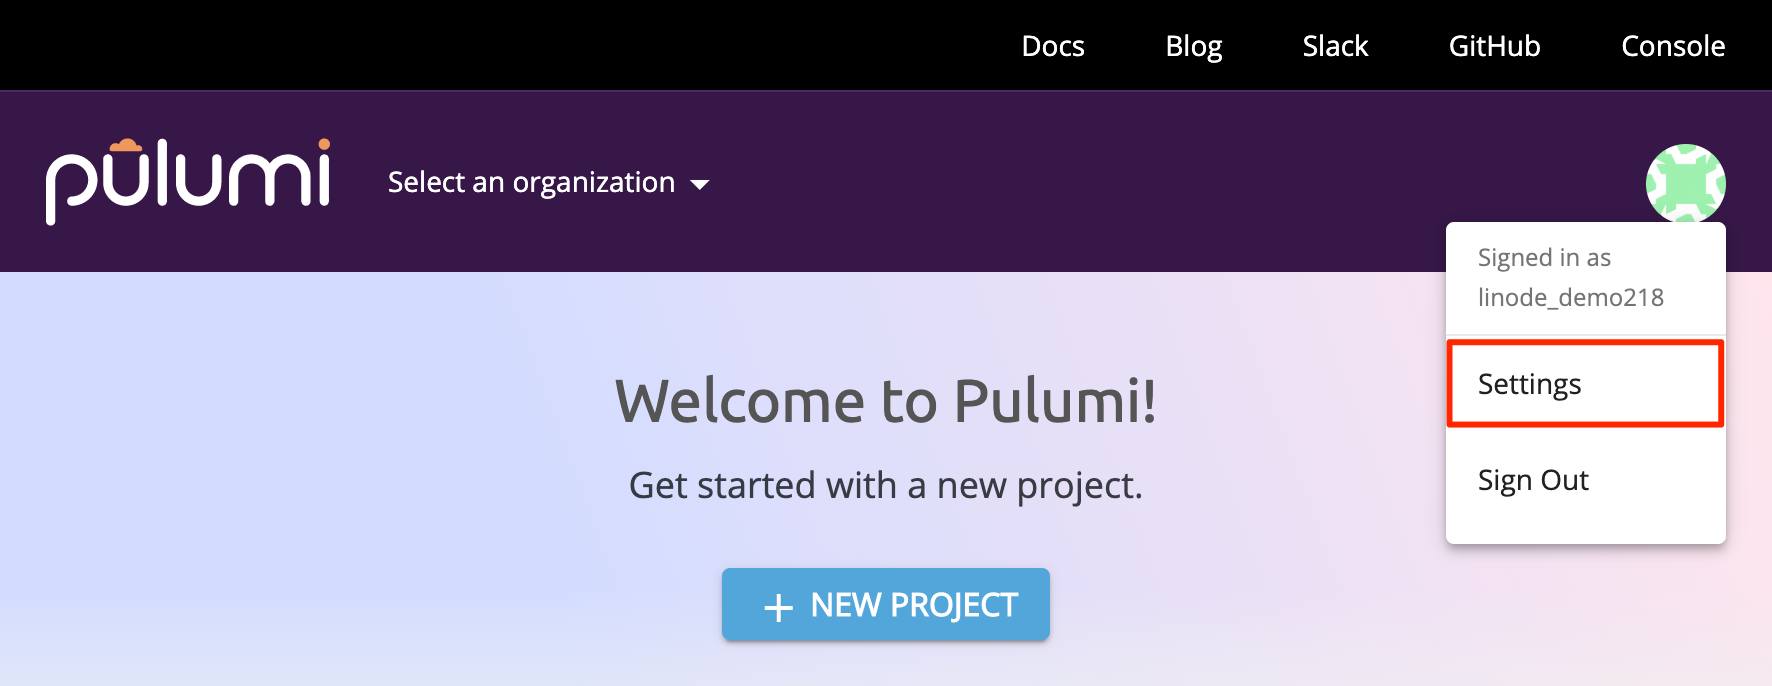
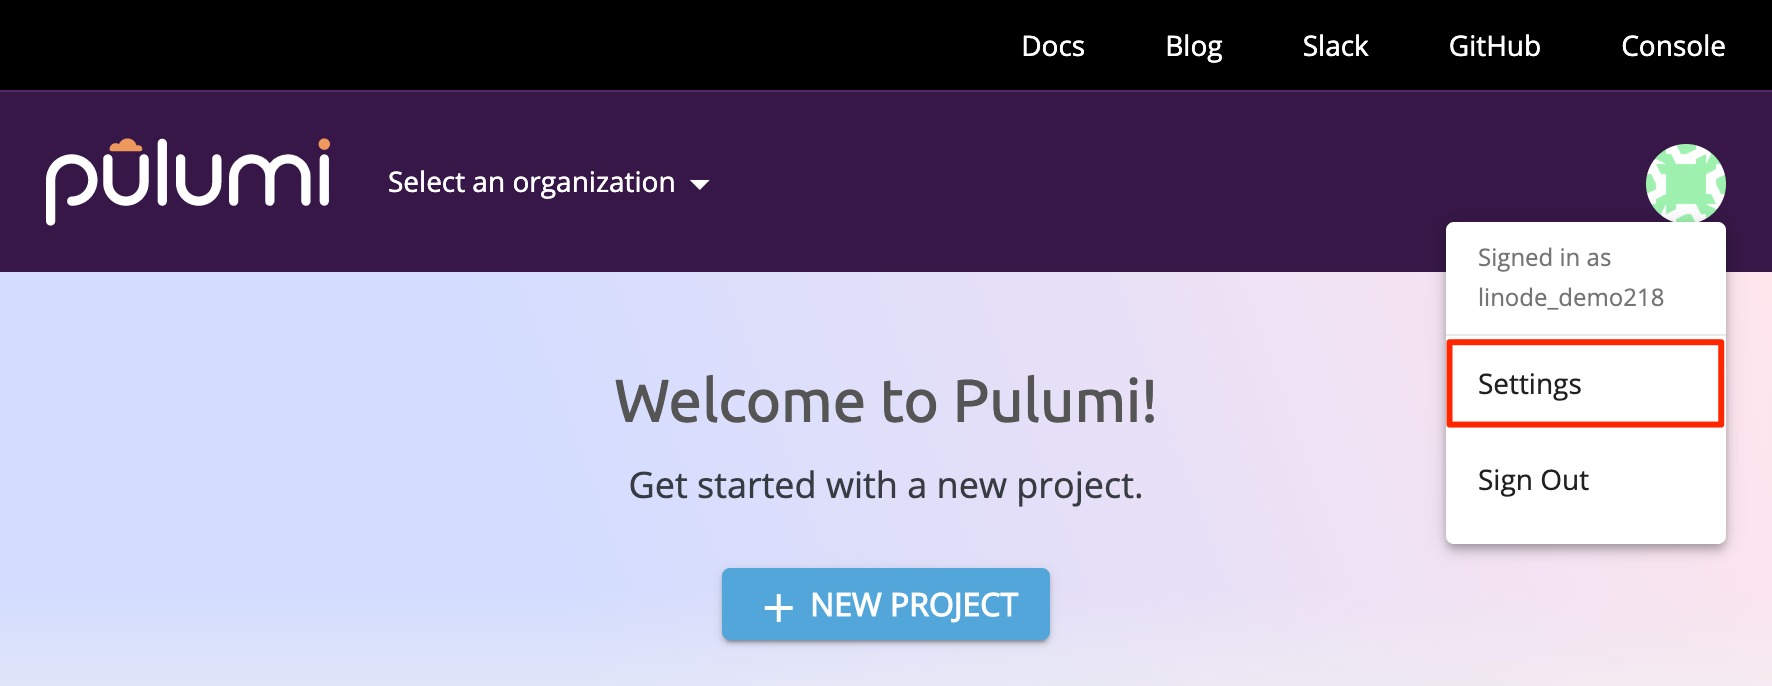
Log into your Pulumi account. After you’ve logged in, click on the avatar graphic to the top right of the Pulumi dashboard, then click on the Settings option in the dropdown menu that appears:
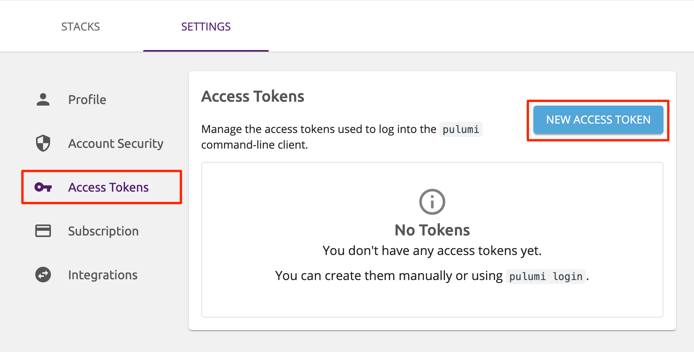
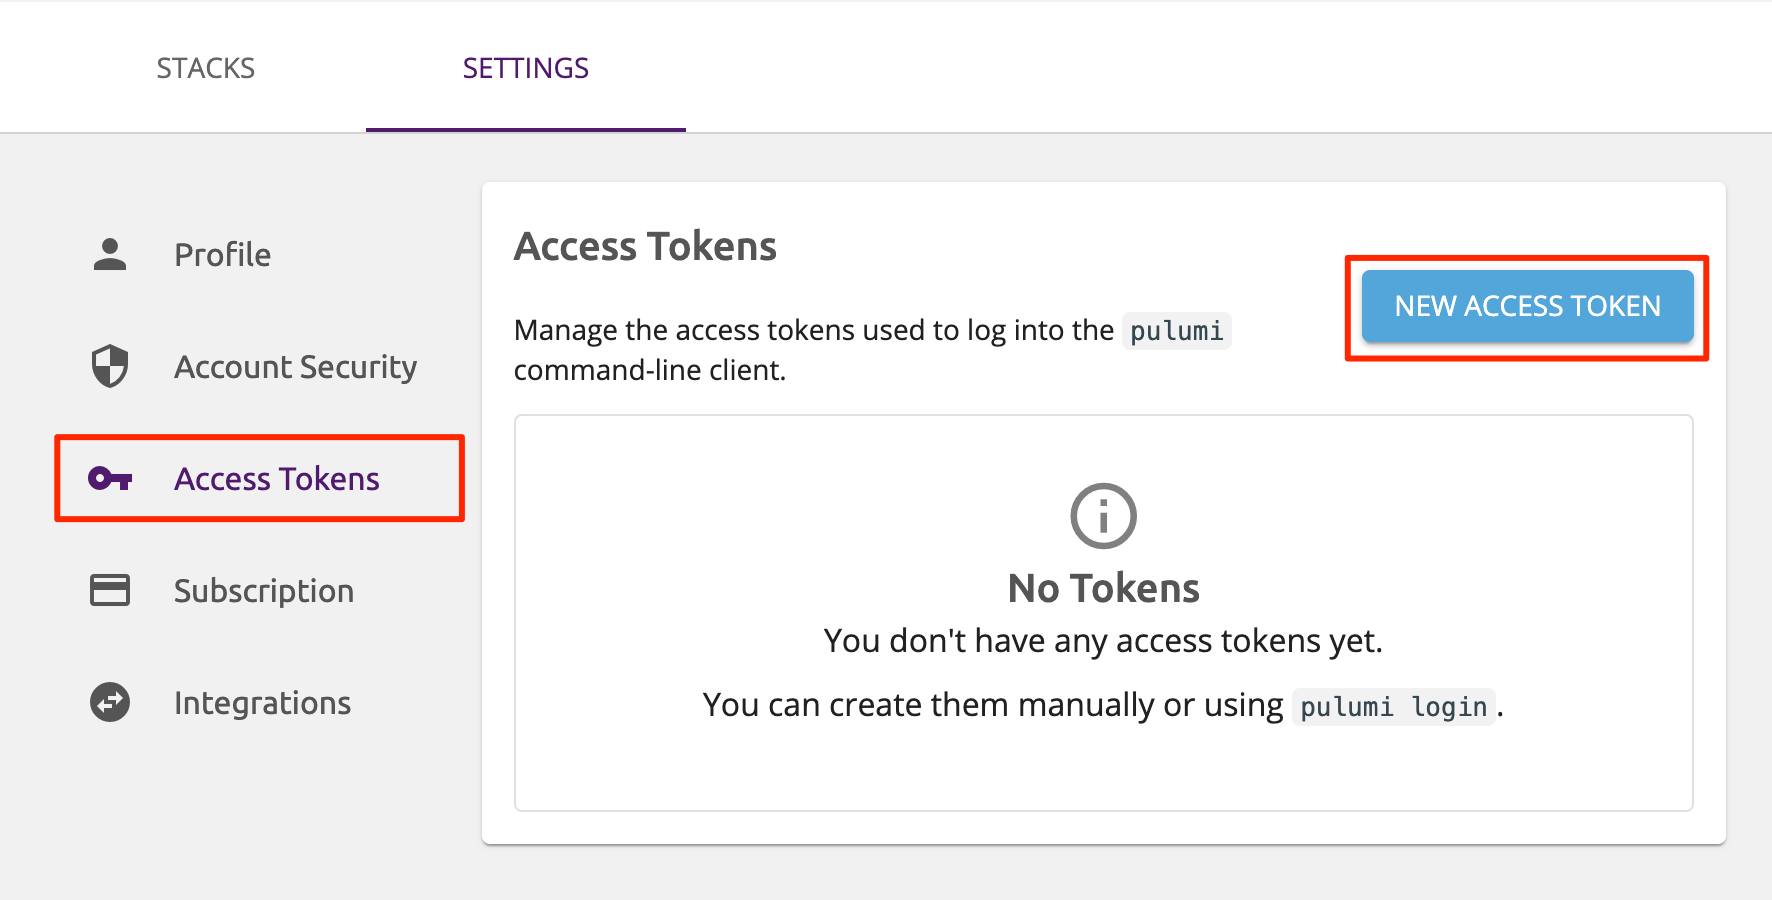
Select the Access Tokens item in the sidebar to the left of the page that appears:
Click on the New Access Token button towards the top right of the following page and follow the prompts to create your new token. Make sure you save this in a secure location, similar to your Linode API token.
Create a Linode
Set up your Pulumi Project
Now that you have everything you need to begin using Pulumi, you can create a new Pulumi project.
NoteA Pulumi project is the folder structure which contains your Pulumi programs. Specifically, a project is any folder which contains aPulumi.yamlmetadata file.
Pulumi requires an empty directory for each new project, so first you’ll need to create one and make it your working directory:
cd ~/ && mkdir pulumi && cd pulumiNow that you’re inside of your new empty working directory, create a new project:
pulumi newFrom here, you’ll see several prompts:
Enter your Pulumi access token if prompted. If you’ve already entered it at any point following the installation of Pulumi, you will not be prompted again and can skip this step.
Use your arrow keys to highlight the
linode-javascriptoption.Enter a project name of your choice, or leave blank to use the default option.
Enter a project description, or leave blank to use the default option.
Enter a stack name of your choice, or leave blank to use the default option.
Multiple instances of your Pulumi programs can be created. For example, you may want to have separate instances for the development, staging, and production environments of your service. Or, you may create multiple instances of your service if you’re offering it to different business clients. In Pulumi, these instances are referred to as stacks.Multiple instances of your Pulumi programs can be created. For example, you may want to have …Enter your Linode API token.
Once the installation is successful, you will see a
Your new project is ready to go!message. Thepulumi newcommand scaffolds a collection of default configuration files in your project’s directory. The default configuration will give you everything you need to get started. Enter thelscommand to ensure that the files are present:lsindex.js package.json Pulumi.pulumi.yaml node_modules package-lock.json Pulumi.yamlThe contents of these files were defined according to our responses to each prompt after entering
pulumi new. In particular:index.jscontains the JavaScript Pulumi will runpackage.jsondefines the dependencies we can use and the file path Pulumi will be reading our code from.
Inspect the Default Configuration
Let’s take a look at the contents of our index.js file:
- File: index.js
1 2 3 4 5 6 7 8 9 10 11 12 13"use strict"; const pulumi = require("@pulumi/pulumi"); const linode = require("@pulumi/linode"); // Create a Linode resource (Linode Instance) const instance = new linode.Instance("my-instance", { type: "g6-nanode-1", region: "us-east", image: "linode/ubuntu18.04", }); // Export the Instance label of the instance exports.instanceLabel = instance.label;
The file requires two JavaScript modules unique to Pulumi: Pulumi’s SDK, and Pulumi’s Linode integration. Pulumi’s API Reference Documentation serves as a reference for the JavaScript you’ll see here. It also includes a library of several additional options that enable you to create configurations more specific to your use case.
In this case, your file is only creating a single 1GB Linode (Nanode) instance in the Newark data center running Ubuntu 18.04.
Create and Destroy Resources
Use Pulumi’s
previewcommand to test your code and make sure it’s successfully able to create resources under your account.pulumi previewThe output of the command will list the operations Pulumi will perform once you deploy your program:
Previewing update (dev): Type Name Plan + pulumi:pulumi:Stack my-pulumi-project-dev create + └─ linode:index:Instance my-instance create Resources: + 2 to createUse Pulumi’s
upcommand to deploy your code to your Linode account:pulumi upNote
This will create a new billable resource on your account.From here, you will be prompted to confirm the resource creation. Use your arrow keys to choose the
yesoption, hitenter, and you will see your resources being created. Once the process is completed, the Linode Label of your new Linode will be displayed. If you check your account manually through the Cloud Manager, you can confirm that this Linode has been successfully created.Since this Linode was only created as a test, you can safely delete it by entering Pulumi’s
destroycommand:pulumi destroyFollow the prompts, and you’ll be able to see the resources being removed, similar to how we could see them being created.
Note
Many Pulumi commands will be logged on your Pulumi account. You can see this under the Activity tab of your project’s stack in Pulumi’s Application Page.
Create and Configure a NodeBalancer
To better demonstrate the power of Pulumi code, we’ll create a new index.js file. This will define everything we need to create a functioning NodeBalancer which is pre-configured with two backend Linodes running NGINX.
Replace the contents of your
index.jsfile with the following:- File: index.js
1 2 3 4 5 6 7 8 9 10 11 12 13 14 15 16 17 18 19 20 21 22 23 24 25 26 27 28 29 30 31 32 33 34 35 36 37 38 39 40 41 42 43 44 45 46 47 48 49 50 51 52 53 54 55 56 57 58 59 60 61 62 63 64 65 66 67 68 69 70 71 72 73 74const pulumi = require("@pulumi/pulumi"); const linode = require("@pulumi/linode"); // Create two new 1GB Linodes (Nanodes) using a StackScript to configure them internally. // The StackScript referenced will install and enable NGINX. // "linode1" (the first argument passed to the Linode instance constructor function) is the Pulumi-allocated Unique Resource Name (URN) for this resource const linode1 = new linode.Instance("linode1", { // "PulumiNode1" is the Linode's label that appears in the Cloud Manager. Linode labels must be unique on your Linode account label: "PulumiNode1", region: "us-east", image: "linode/debian9", privateIp: true, stackscriptData: { hostname: "PulumiNode1", }, stackscriptId: 526246, type:"g6-nanode-1", }); const linode2 = new linode.Instance("linode2", { label: "PulumiNode2", region: "us-east", image: "linode/debian9", privateIp: true, stackscriptData: { hostname: "PulumiNode2", }, stackscriptId: 526246, type:"g6-nanode-1", }); // Create and configure your NodeBalancer const nodeBalancer = new linode.NodeBalancer("nodeBalancer", { clientConnThrottle: 20, label: "PulumiNodeBalancer", region: "us-east", }); const nodeBalancerConfig = new linode.NodeBalancerConfig("nodeBalancerConfig", { algorithm: "source", check: "http", checkAttempts: 3, checkTimeout: 30, checkInterval: 40, checkPath: "/", nodebalancerId: nodeBalancer.id, port: 8088, protocol: "http", stickiness: "http_cookie", }); // Assign your Linodes to the NodeBalancer const balancerNode1 = new linode.NodeBalancerNode("balancerNode1", { address: pulumi.concat(linode1.privateIpAddress, ":80"), configId: nodeBalancerConfig.id, label: "PulumiBalancerNode1", nodebalancerId: nodeBalancer.id, weight: 50, }); const balancerNode2 = new linode.NodeBalancerNode("balancerNode2", { address: pulumi.concat(linode2.privateIpAddress, ":80"), configId: nodeBalancerConfig.id, label: "PulumiBalancerNode2", nodebalancerId: nodeBalancer.id, weight: 50, }); //Output your NodeBalancer's Public IPV4 address and the port we configured to access it exports.nodeBalancerIP = nodeBalancer.ipv4; exports.nodeBalancerPort = nodeBalancerConfig.port;
Note
In our
index.jsfile we’ve created and configured two Linodes using an existing StackScript which installs NGINX. Pulumi’s Linode integration allows for the creation of entirely new StackScripts directly in code, which can help you to automate your deployments even further.If you’re interested in seeing how this StackScript works, you can view it here.
Now that you’ve successfully prepared your JavaScript code, let’s bring up our configuration:
pulumi upAs before, select
yeswhen prompted and wait for a few moments as your resources are created, configured, and brought online.Once the process is completed, you’ll see your NodeBalancer’s IP address and the port you configured earlier displayed as part of the output:
Outputs: + nodeBalancerIP : "192.0.2.3" + nodeBalancerPort: 8088Enter this IP address and port into your web browser, and you will see the Hello World-style page that the StackScript configured:
curl http://192.0.2.3:8088/Hello from PulumiNode1Note
If you do not see this page right away, you should wait a few additional moments. NodeBalancers can sometimes require a little extra time to fully apply a new configuration.Once you’re finished with your NodeBalancer, you can remove and delete everything you added by entering
pulumi destroyas before.
Next Steps
Pulumi is a powerful tool with a vast number of possible configurations that can be applied. From here you can:
Look at Pulumi’s examples for more ideas regarding the things you can do with Pulumi.
Try using Pulumi with different languages like Python or TypeScript
Import Node.js tools like Express for even more elasticity with your code.
Use Pulumi for Serverless Computing
More Information
You may wish to consult the following resources for additional information on this topic. While these are provided in the hope that they will be useful, please note that we cannot vouch for the accuracy or timeliness of externally hosted materials.
This page was originally published on


